
Frequently Asked Questions
Find the answers to all things PropertyPal here
- Home
- Agent FAQ
- PropertyPal Agent Websites
- How do I add a News Article/Blog Post to my Website?
How do I add a News Article/Blog Post to my Website?
Please be aware that not all PropertyPal Websites have this facility. If you are unsure, you can submit a form below to query this.
1. Firstly you need to Login to PropertyPal using the Estate Agents Login.
2. Click on Website on the Left hand side of the page.
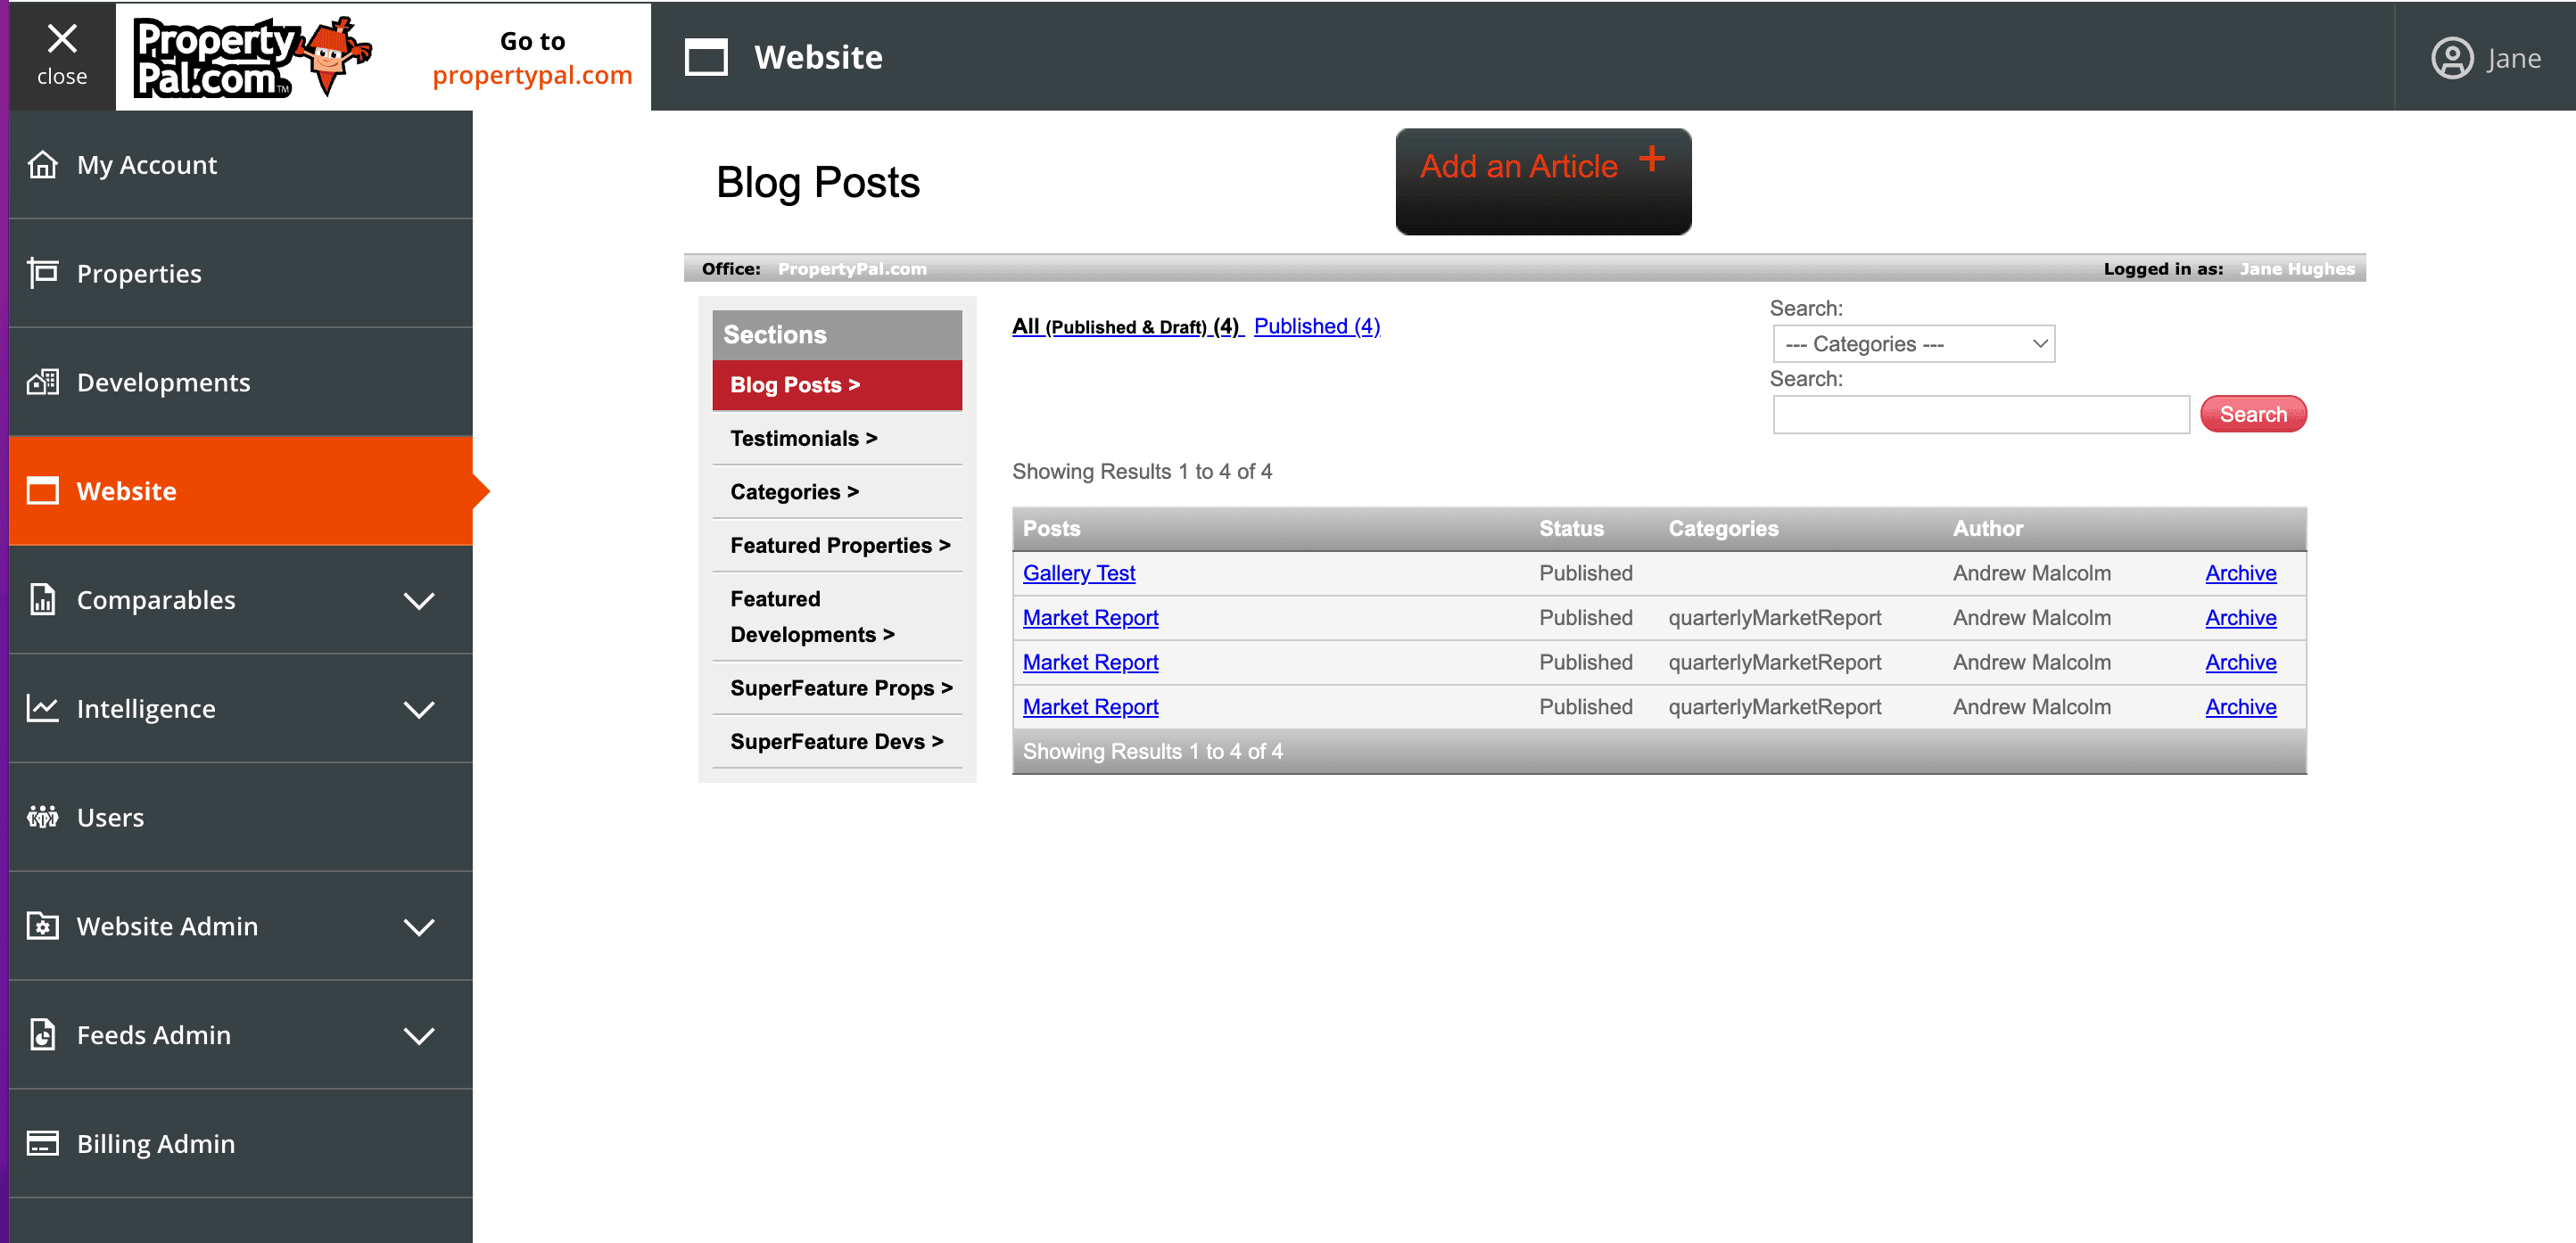
3. Click on Blog Posts and then Add an Article.
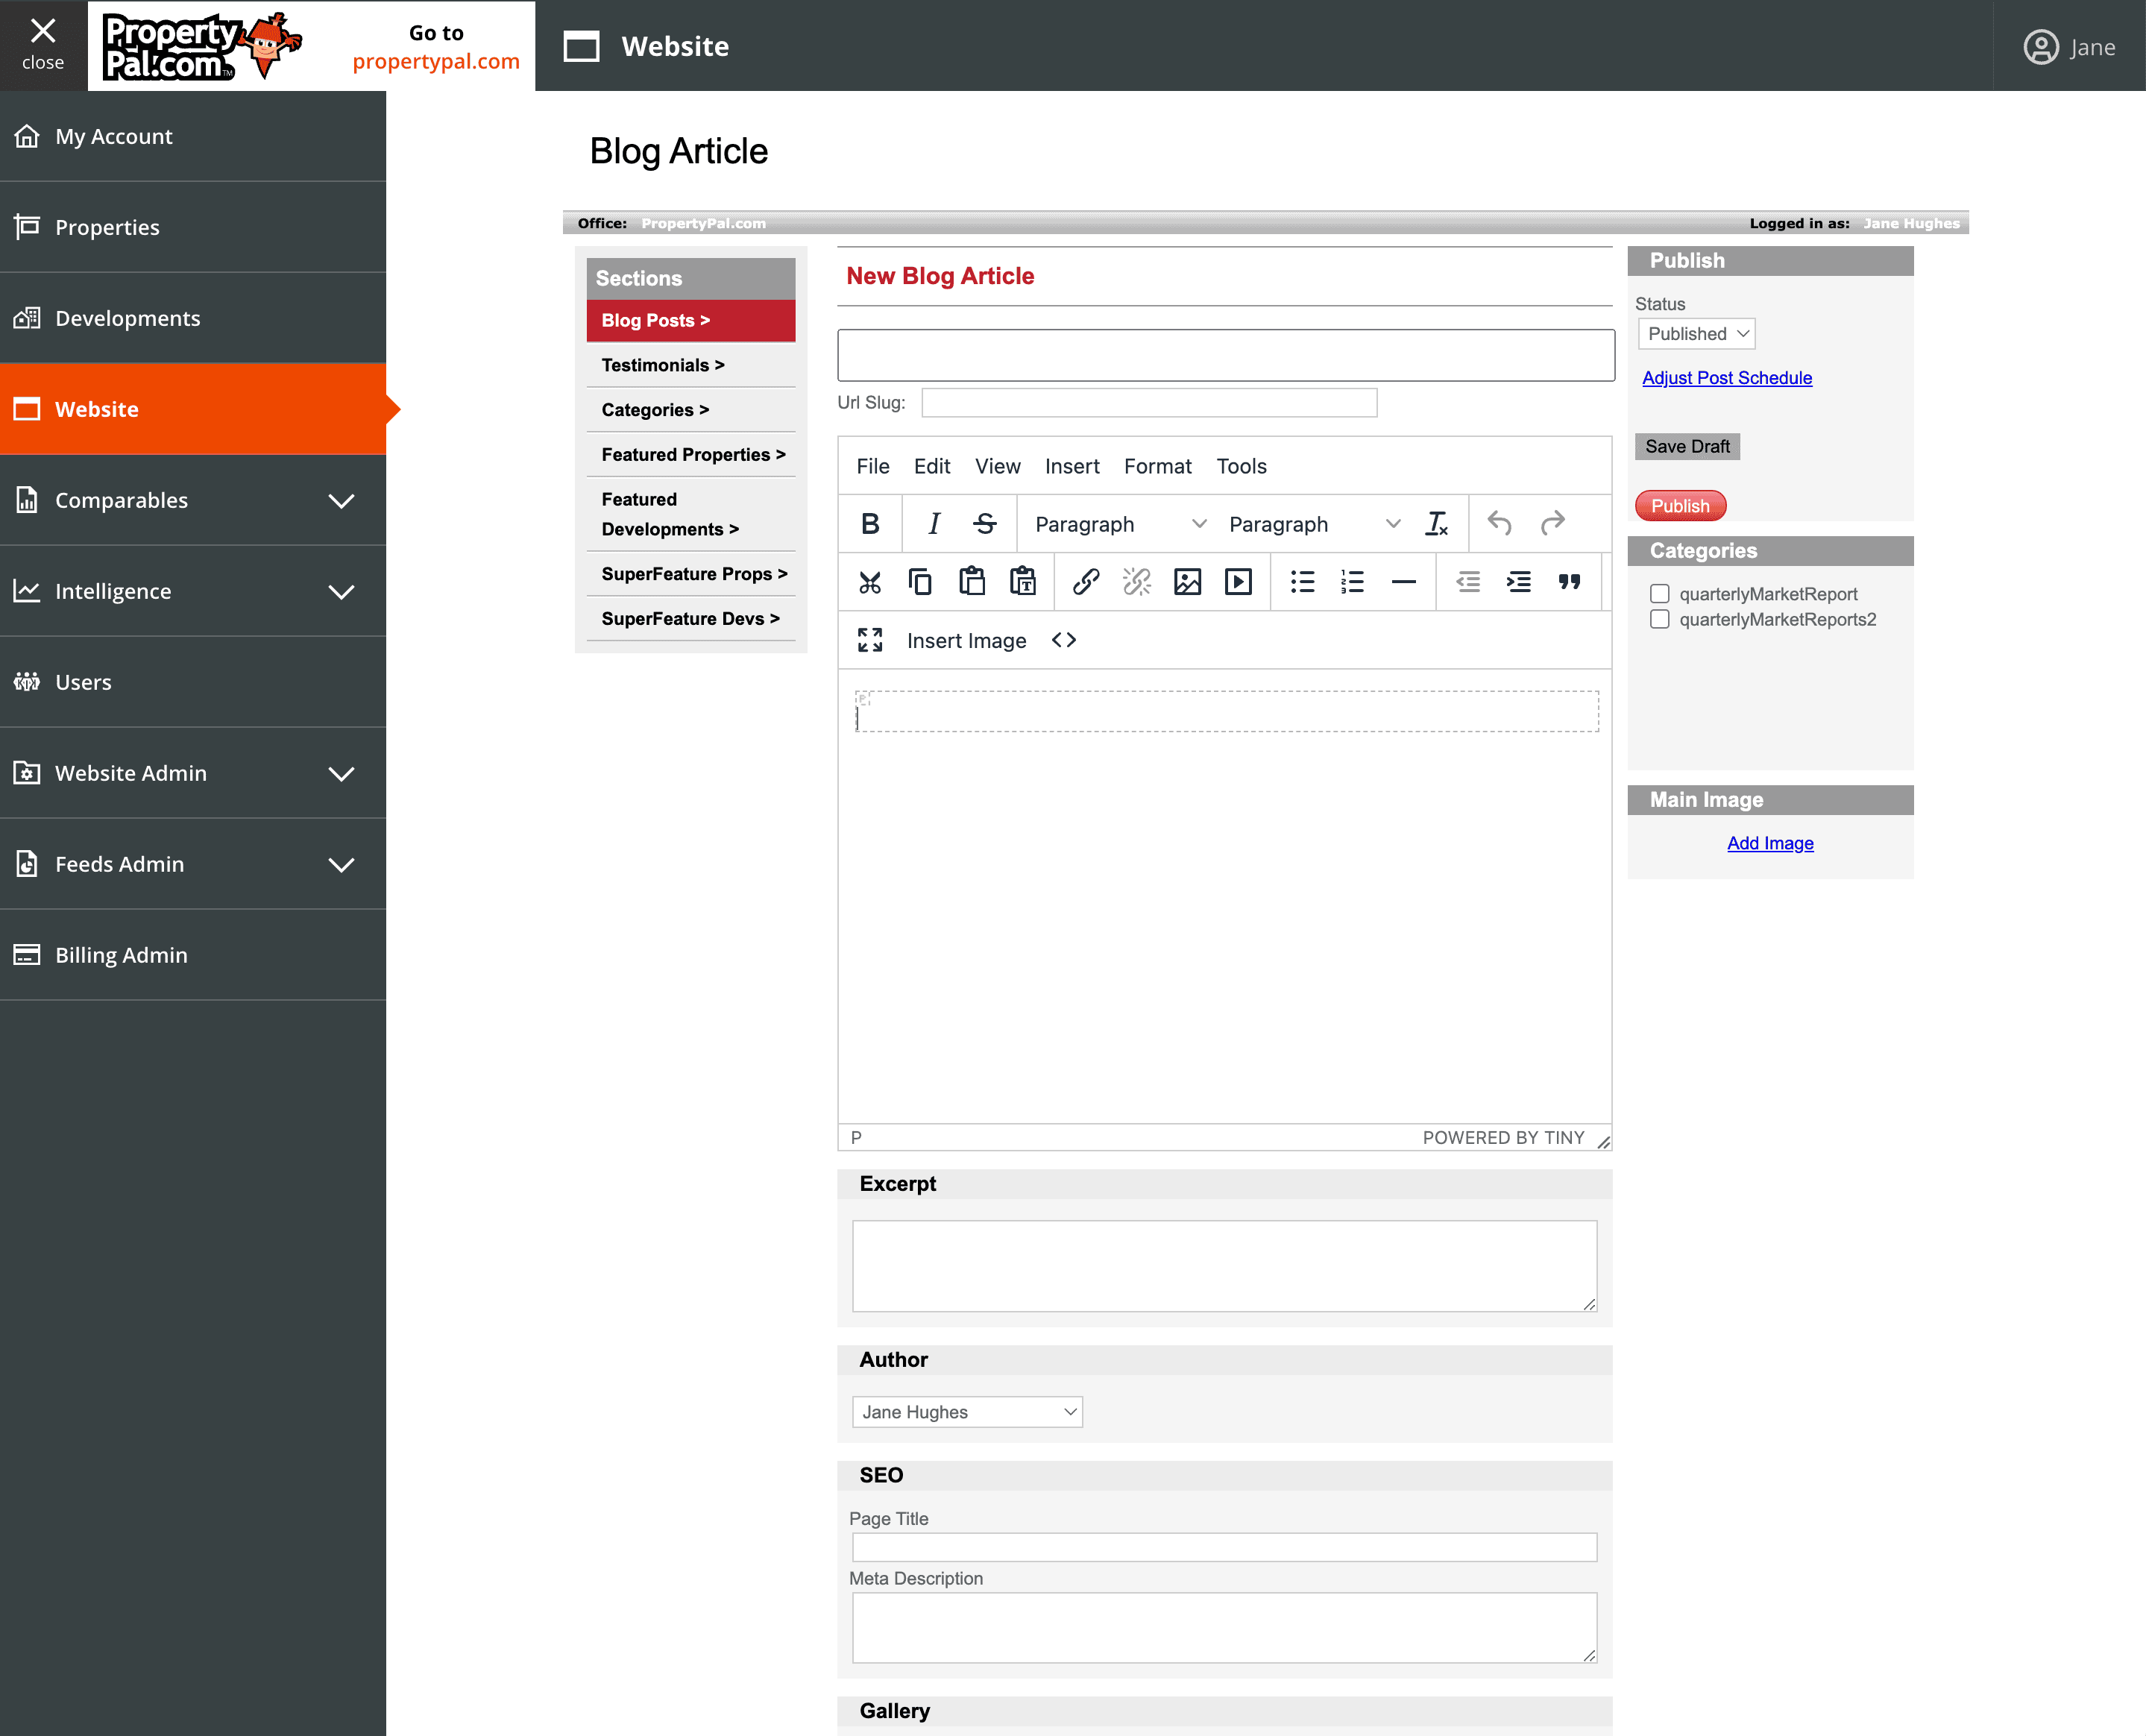
Title – this is the title of your article/blog.
URL Slug - Tab through to automatically populate the URL Slug.
Description - Enter the text for your article and format accordingly.
Excerpt - You can create an introduction for the news article (i.e. when the article is visible on your website homepage) – if you leave this blank, an excerpt will be created from the text within the article.
SEO -The page title has 2 main functions
• The title will be displayed within the address bar in your website link.
• It’s the name of the clickable link used in Google search results.
(This is not mandatory as Google will create its own, although Google will use the text it sees and this may not be ideal.)
Meta Description - A Meta Description’s main function is similar to that of the Excerpt although this time in Google. A well written Meta description will describe what can be found on the page and why the user should use it. Meta Descriptions and titles ‘override’ what Google picks up from the page, which gives you complete control of what the visitors see in the search engine results page.
If you do not have much experience with the above, it will be created automatically from what text is in the article.
3. Adding Images:
There are 2 ways to add images or photos to your news article.
Main Images: A main image is the image that will appear on your news page/homepage (if recent news is present on your website). You can add this by simply clicking ‘add image’ under the ‘Main Image’ section to the right.
Gallery Images: These will appear within each individual news article (if added, not required). You can add these by simply clicking ‘add image’ within the ‘Gallery’ section.
How to Create a Gallery: To add an image to the Gallery, click on Add Image and a pop up window will appear. At the top you will be able to see 2 tabs “Normal Uploader” and “Basic Uploader”.
Normal Uploader:
1. Click on the “Add More Photos” button, navigate to where you images are located, select the image then click “Open”.
2. If you select the wrong image by mistake click cancel. Click Upload then select the correct image.
Basic Uploader:
1. Click on the Basic Uploader tab.
2. Choose your images individually from from your computer in the usual manner.
3. Click Start Upload.
Once you are happy you can either save the Article/Blog as a ‘Draft‘ (this means your content will be saved but not live on your Website)., or you can ‘Publish‘ the Article/Blog which will add it to your Website. *Please note: You can make a ‘Draft’ article ‘Published’ but once published you cannot make it a draft.
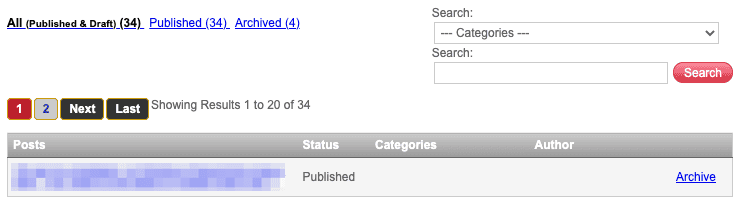
Archive: If you no-longer wish an article to be viewable clicking “Archive” will archive it. You can un-archive an article by clicking “Restore” or you can delete an article by clicking “Delete”.
Please Note – When you restore an article, it will go into the “Draft” section, you will then need to publish this in the usual manner as detailed above.
Other articles in this section
- Can Propertypal.com build my website?
- How do enquiry forms work on my website?
- How do I add a Featured Property/Development on my own Website?
- How do I add a Testimonial to my Website?
- How do I move a re-listed property to the top of my search results on my website?
- How do I use my PropertyPal Brochures/Rental & Sales Lists?
- I would like to add a property to my own website, but not to PropertyPal, how do I do this?
- If I choose to get brochures with PropertyPal, what options do I have?
- Uploading a ‘Superfeature’ image/video on your homepage.
- What content can I change on my PropertyPal Website?