Back to New Developments
How do I add a New Development on PropertyPal?
Adding a New Development is slightly different from adding a single re-sale property on PropertyPal.com. You will need to add the New Development then add the property types and finally the individual unit (properties for sale). This section explains how to do this.
1. Firstly you need to Login to PropertyPal using the Estate Agents Login.
2. Click on Developments on the Left hand side of the page. You will be taken to your list of Developments.
3. Click on the Add a Development button at the top of the page. This will open the Select a Developer page.

4. Select your developer from the drop down list. If your chosen developer is not on the list email [email protected] with the details and we will add it for you. Click Next.
Note: You will find some anonymous developers on the list for those developers who do not want to be named on the websites. These anonymous developers are:
- Private Developer
- Undisclosed Developer
- Multiple Developers
Sole Agents
If you are a sole agent on this development click the Add New Development button and move to step 6.
Joint Agents
If you are a joint agent on this development, use the drop down to see if the development has been added by the other agent. Click on your chosen development and click Next. You have been added as an agent to this Development!!!
5. Fill in the details of the Development. Please note that this is the description of the whole development, and not of individual properties.
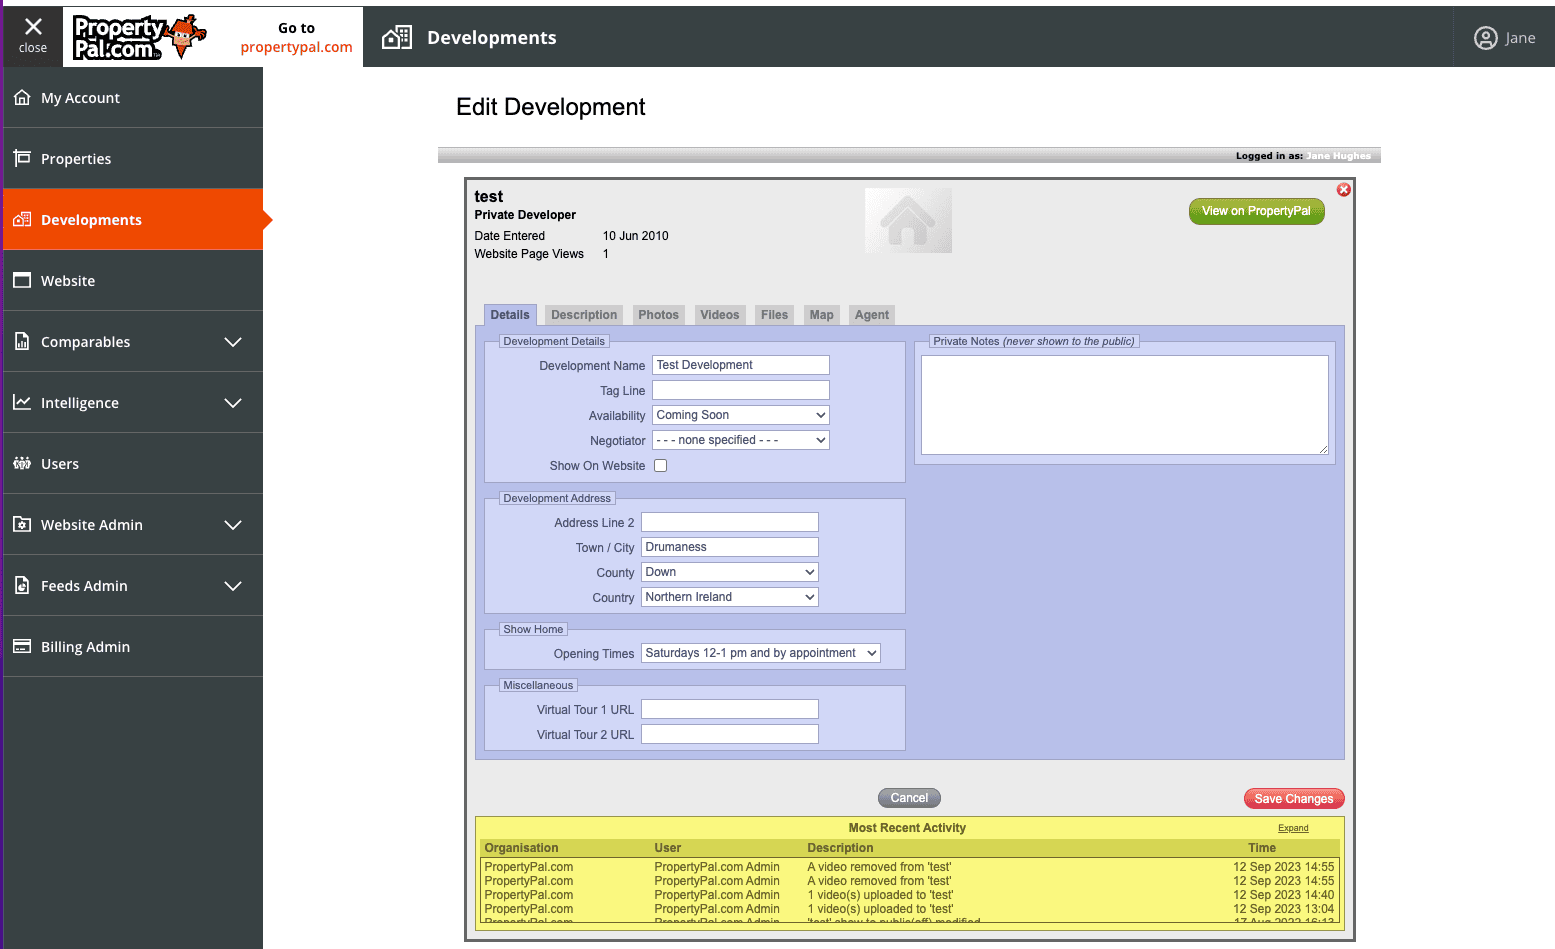
The Tag Line is a 60 character field that allows you to distinguish this development from the others, ie Eco friendly development with Solar Panels.
When this page is complete, click Next.
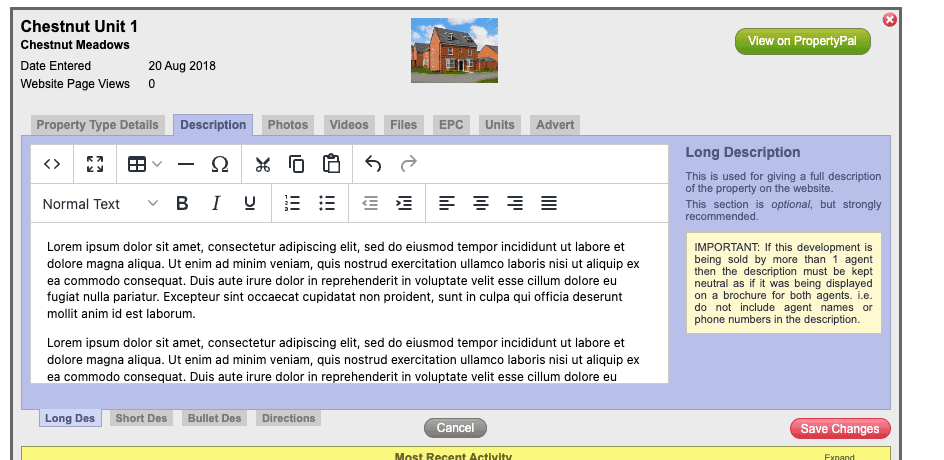
7. The following page is the development description. This is a free text box which allows you to type directly into the box or to copy and paste text from another document. When you are happy with the layout etc, click Next.
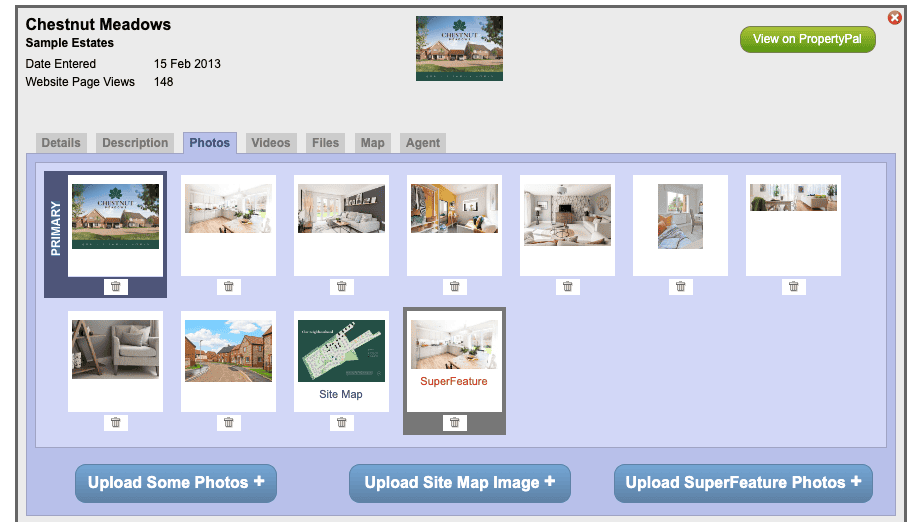
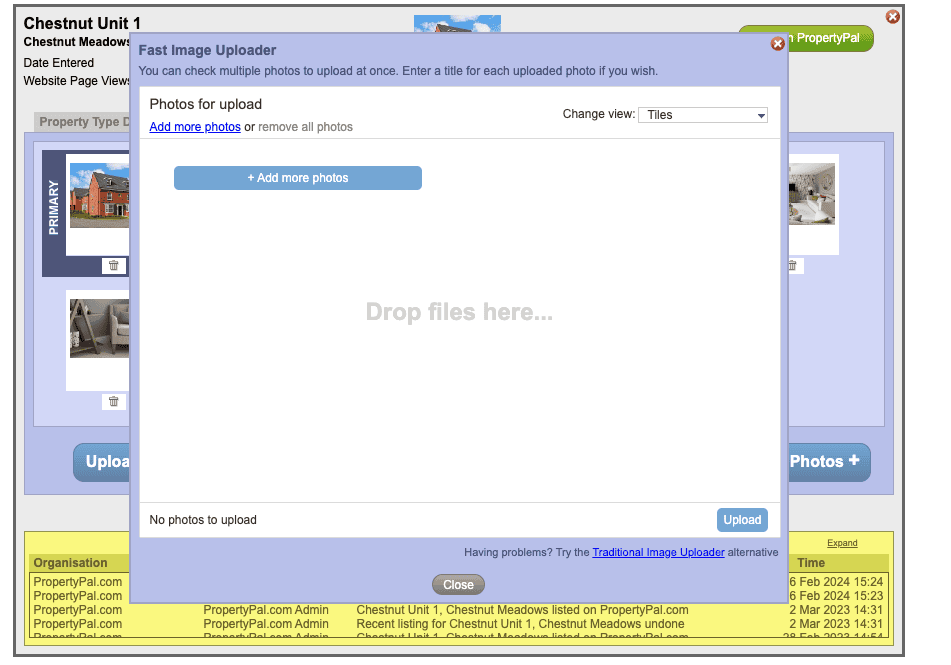
8. To upload photos of the property click on the Upload Some Photos button. This will open a pop up for the Fast Image Uploader. Click on + Add more photos, then locate the relevant file where the photos are stored. You can either double click on a photo to upload it or, if you are uploading several photos, hold down the shift key on your keyboard and click on multiple photos. Once you have made your selection (as many photos as you like) click Upload. This will re- size the photos appropriately.

9. Once the images are uploaded you may find that they are not in the order that you would like them in. To re-order them you simply drag and drop them into the correct order. Please note that the Primary image is the first image that will be seen on the website. When you are happy with the order, please click Next.
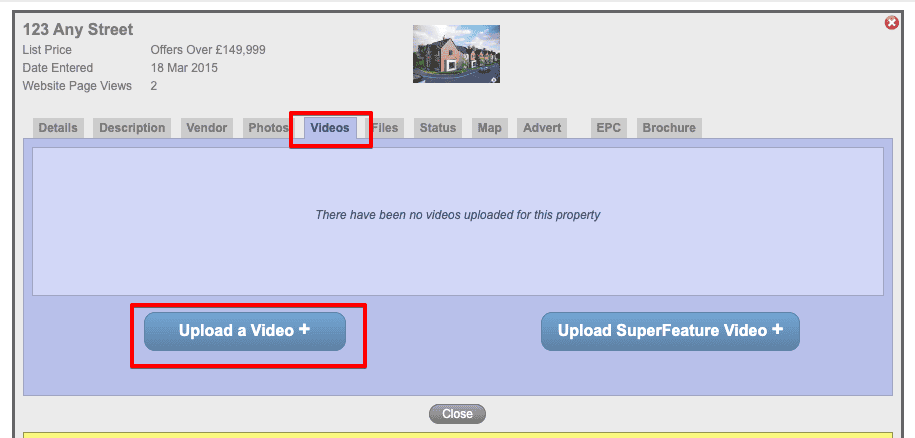
10. To add a video to your development.
If you have a video in file format, please follow the steps below:
NOTE: We have a limit of 200mb for video files. Please use a tool to resize the video to below this limit. Here are some example free tools you could use: veed.io or handbrake.fr/downloads.php.
11. Click on to the ‘Videos’ tab as below and then click Upload a Video:
12. Upload the video by clicking ‘Upload a Video’, then Add a video. You will be taken to the file system on your computer where you can then choose the video to upload.
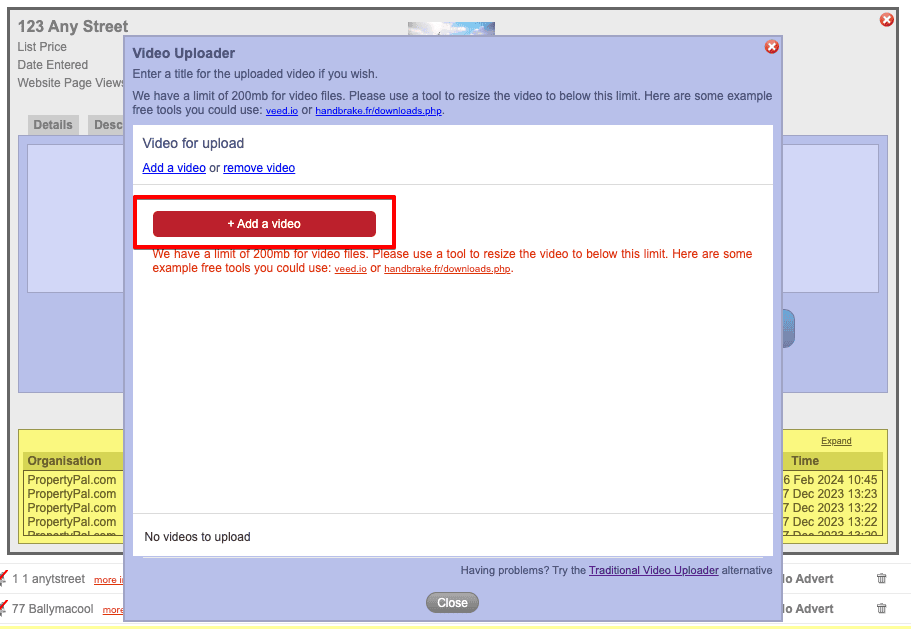
NOTE: It may take a few minutes for the video to upload to the server depending on the size and format.
13. The Files page is where you will upload PDFs of the brochure of the Development or any relevant floor plans. This is not a mandatory item. To upload, simply click on the Upload PDF Files.

This will open a window where you can choose your files. You will be required to specify names for these files when uploading. Brochure, or Floor Plan, etc will suffice.
14. We move on then to the Map screen. When we entered the Town for the development on the Details screen a marker was placed on the map corresponding with this town.
To adjust the marker, simply zoom into the map using the + button and drag our mascot to the exact spot. To finish you will need to rate how accurate you are with the marker! To do this simply click on the relevant accuracy rating on the right hand side of the map.

You may find it easier to swap the view on this screen to Satellite view . To switch to Satellite view simply click the Satellite button on the top right hand side of the map.
15. The next page simply shows you the agent or agents selling the development. You can also add a joint agent by using the dropdown and clicking on the relevant agent.
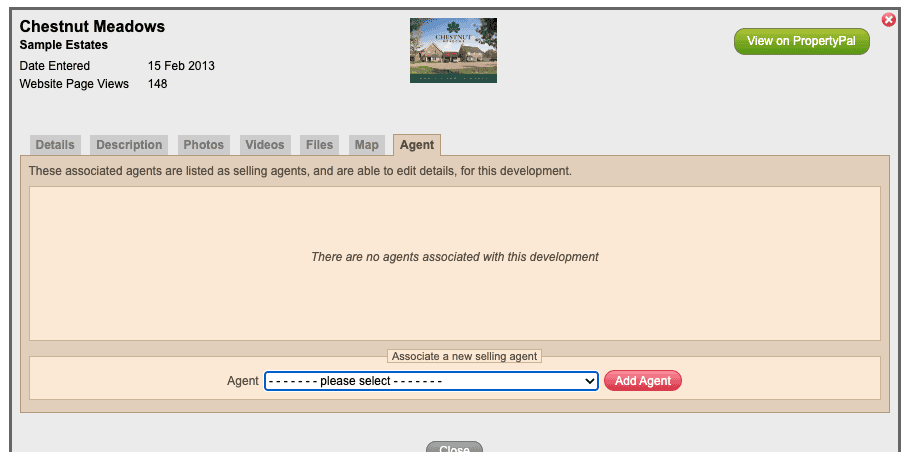
Click Finish to move on to the next step. You have now added the development as a whole, you now need to add the property types and individual units.
16. You will find yourself back on the Development List page at this point. To add a property type click on the black Add a Property Type button on the development.
17. Fill in the details of the Property Type. Please note that this is the description of the particular property type, and not of individual properties or the whole development. The Tag Line is a 60 character field that allows you to distinguish this development from the others, ie Eco friendly development with Solar Panels. When this page is complete, click Next.

18. The following page is the Property Type description. This is a free text box which allows you to type directly into the box or to copy and paste text from another document. When you are happy with the layout etc, click Next.
19. To upload photos of the property click on the Upload Some Photos button. This will open a pop up for the Fast Image Uploader. Click on + Add more photos, then locate the relevant file where the photos are stored. You can either double click on a photo to upload it or, if you are uploading several photos, hold down the shift key on your keyboard and click on multiple photos. Once you have made your selection (as many photos as you like) click Upload. This will re- size the photos appropriately.
20. Once the images are uploaded you may find that they are not in the order that you would like them in. To re-order them you simply drag and drop them into the correct order. Please note that the Primary image is the first image that will be seen on the website. When you are happy with the order, please click Next.

21. If you have added the Development Brochure on the development, you shouldnt need to add it again here. This is where you will upload PDFs of the individual house type brochures or any relevant floor plans. To upload, simply click on the Upload PDF Files. This will open a window where you can choose your files. You will be required to specify names for these files when uploading. Brochure, or Floor Plan, etc will suffice.

22. The next page is where you add the individual units or properties. Click on the Add a Property Unit button.

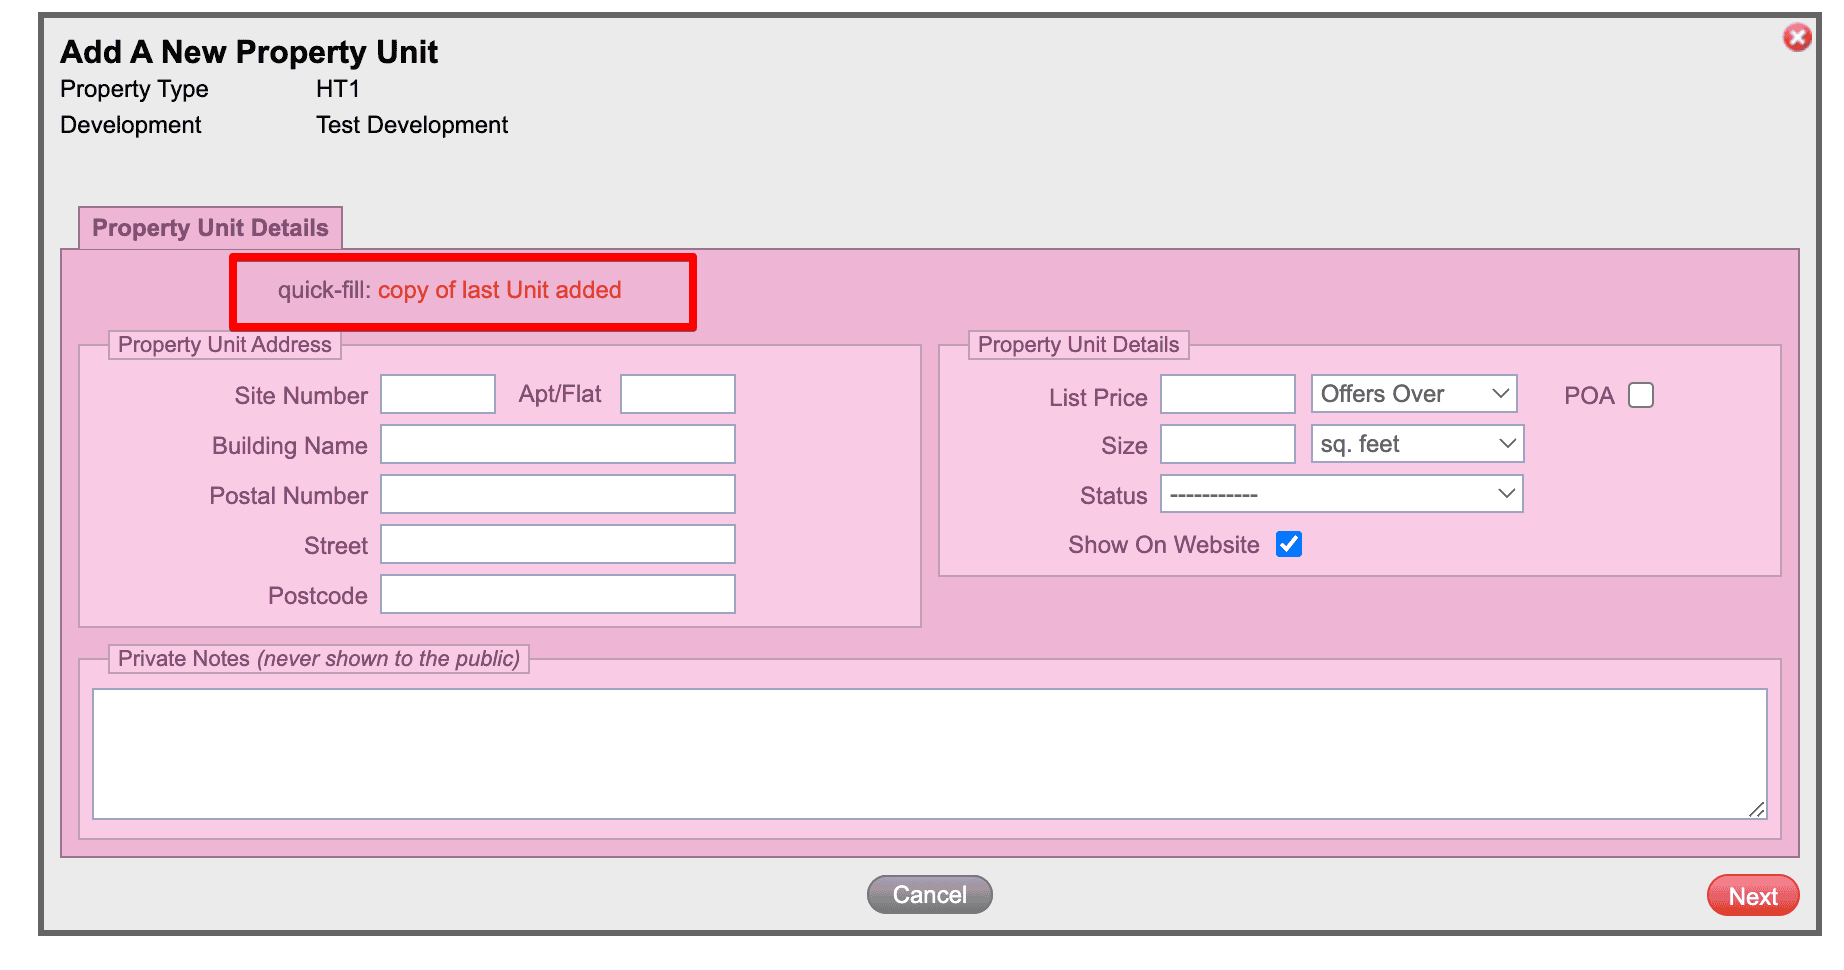
23. Fill in as many details as you have on this page, and click Finish when you are happy with your selections. No Postcode is required as most developments do not have a postcode allocated at this stage.

24. To add another property unit click again on the Add a Property Unit button, this time click the Copy Last Unit Added button. This will copy all the details from the last unit except the Site or Postal Number. Repeat this step until you have all your Property Units added.
25. Please note that your New Development will not show on PropertyPal.com unless you have at least one Property Type and Property Unit added.
26. The next page you come to is the Advert page. This is the page that will show you the status of this property on PropertyPal.com. You will see that at present the property has No Advert on PropertyPal.com.

27. To list the property on PropertyPal.com click on the List on PropertyPal.com button. A pop up will then show asking you to confirm that you are happy to list this property.
28. If this is the case, click on List on PropertyPal.com, and confirm. Your property is now live on PropertyPal.com!